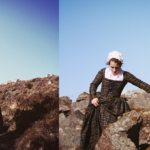
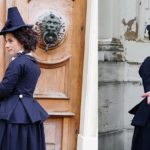
Das Riding Habit Shirt ist wie der Name schon sagt ein Teil der Reit- / Reisekleidung. Es wird zwischen Schnürbrust und Weste getragen, daher sind nur Ärmel- und Kragenrüschen zu sehen. Da Reitkleidung sich an der Herren- bzw. Militärmode orientiert, gleicht der Aufbau des Habit Shirts einem Herrenhemd.
The Riding Habit Shirt is part of a riding / traveling outfit. It is worn between stays and waistcoat, so the ruffles of the sleeves and the neckline can be seen only. Riding Habits are inspired by mens and military fashion. The construction of the shirt is similiar to a mans shift.
MATERIAL
* weißer Batist/Voile/dünne Baumwolle / Musselin
* 130 – 150 cm weißes Band (z.B. Haushaltsband)
* white Batist / Voile / Cotton / Musslin
* 130 – 150 cm Ribbon
HERSTELLUNG / HOW TO DO
Ich habe nirgendwo eine Schnittvorlage gefunden, darum habe ich selbst meinen Schnitt konstruiert. Auf dem Bild habe ich alle Maße eingetragen. Wer eine Größe 36/38 trägt, kann die Maße sicherlich ohne große Abweichung verwenden können. Ansonsten muss dementsprechend erweitert werden. Ich empfehle ein Probestück zu erstellen und daran die dementsprechenden Anpassungen zu machen. Auf jedenfall überprüft werden sollte die Ärmellänge und Weite am Handgelenk, sowie die Kragenweite und Brustweite.
Alle Verbindungsnähte werden mit Kappnähten genäht, alle Saumnähte mit dem Saumstich.
I haven‘t found any pattern of a shirt, so I had to construct my own pattern. On the picture you can see my construction and all my measures. If you wear a german size 36/38, you can use this with little adjustment. Otherwise you have to extend. Controll if sleeve length, cuff width, collar width and bust width ar fitting. I recommend a sample piece to get the perfect fit.
All connecting seams are sewn with a flat felled seam, all other seams with a hem stitch.
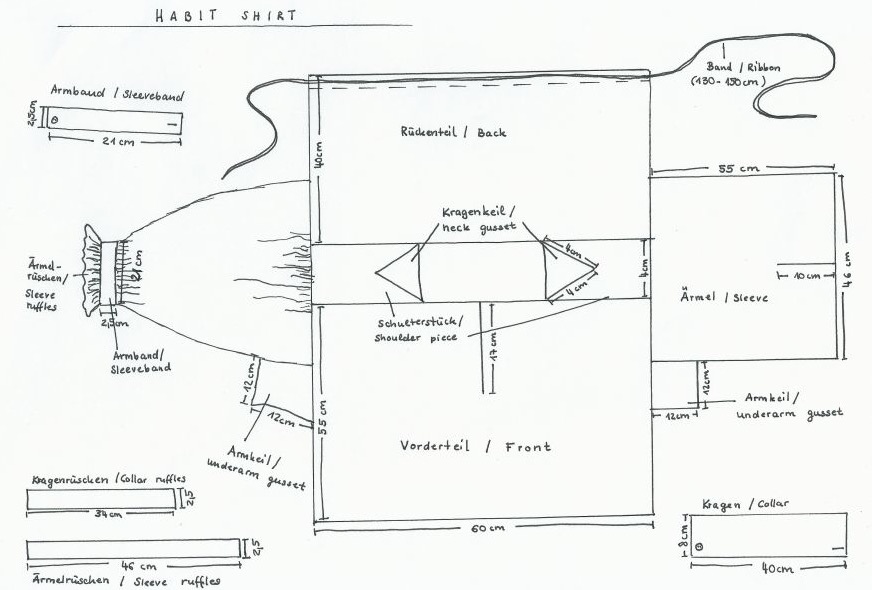
Mein konstruierter Schnitt mit allen Längen. Klick für größere Auflösung./ My pattern with all lengths. Click for larger picture.
#01 Setze zuerst die Keile in das Schulterstück ein. Dieses widerum werden an die beiden Hauptteile angesetzt. Im Hauptteil kann gleich der Schlitz eingeschnitt werden – so kann das Shirt auch während dem Nähens schon immer wieder anprobiert werden. Der Keil bewirkt, dass der Kragen nicht zu eng wird.
#01 First insert the neck gussets into the shoulder pieces. With the gusset the collar will get wider. Insert the shoulder piece between the front and back bodice. You can also cut the opening in the center of the front bodice so you can try the shirt on.
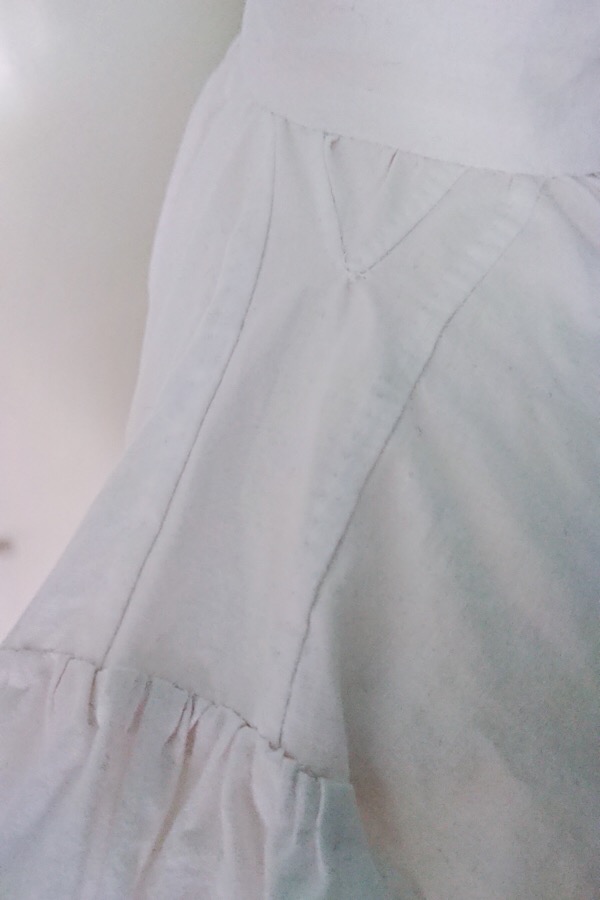
Das fertig eingesetzte Schulterstück.
#02 Nun wird der Kragen angesetzt. Dafür wird der komplette Ausschnitt (auch die Keile) sauber gerüscht und an den Kragenteil genäht.
#02 Gather the neckline (the gusserts too) and add the collar.
#03 Der Ärmel wird zusammengenäht, dabei bleibt unten ein Spalt von etwa 10cm offen und im oberen Teil wird der Armkeil eingesetzt. Dann kann der Ärmel an das Hemd gesetzt werden. Ich habe den Ärmel an der Oberseite etwas eingereiht, damit er dort mehr Volumen bekommt. Wer nicht ganz so viel Ärmelweite möchte, muss die Breite der Ärmel nur veringern und kann sie ohne Rüschen anbringen.
#03 Sew the sleeves together. Leave the seam at the wrist end open for about 10 cm and add on the other side the underarm gussets. Now you can sew the sleeve to your shirt. I gathered the sleeve on the shoulder to get more volume. If you want to have a tigther sleeve, then short the sleeve width an sew it on without any gathering.
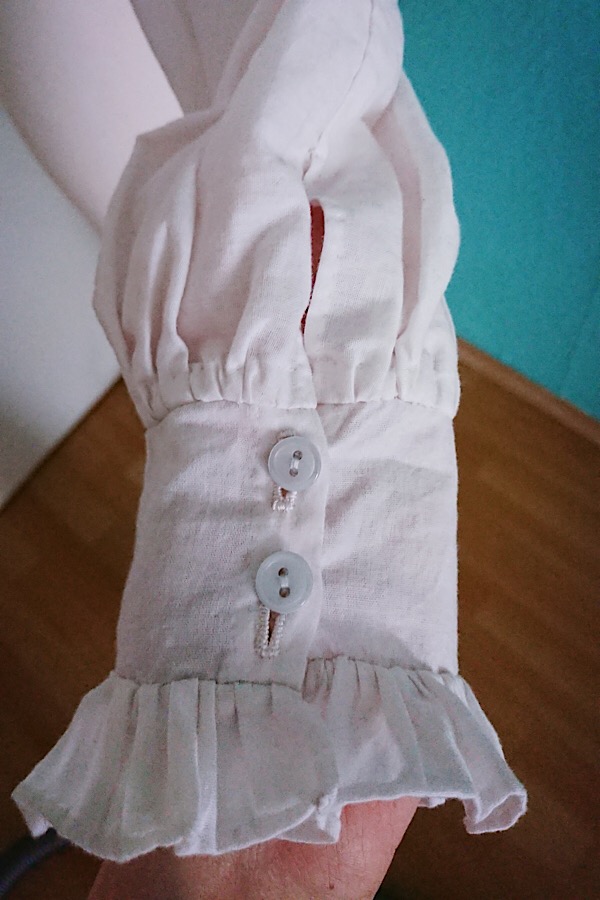
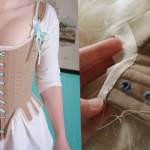
Mein Ärmelabschluss. Ich habe leider noch keine kleinen authentischen Knöpfe gefunden, sobald ich welche habe, werde ich sie ersetzen. / My finished sleeve. The buttons are not authentic but will be replaced when I find some new.
#04 Der untere Ärmelteil wird gerüscht und das Armband darübersetzt. Dort werden später die Knöpfe befestigt.
#04 Gather the lower sleeves and attach the armband, that is later closed with a button.
#05 Die Rüschenbänder werden versäumt und an dem Ärmelabschluss und dem Kragenschlitz angesetzt. Am Rückenteil wird zudem unten ein Tunnel genäht, durch den das Haushaltsband gezogen wird. Damit wird der Habit zugebunden und fixiert. Alle bisher noch offenen Säume können jetzt geschlossen werden.
#05 Add the ruffles to collar and armband. Sew a tunnel at the bottom of the back bodice and insert the ribbon to tie up your shirt. Close all open seams.

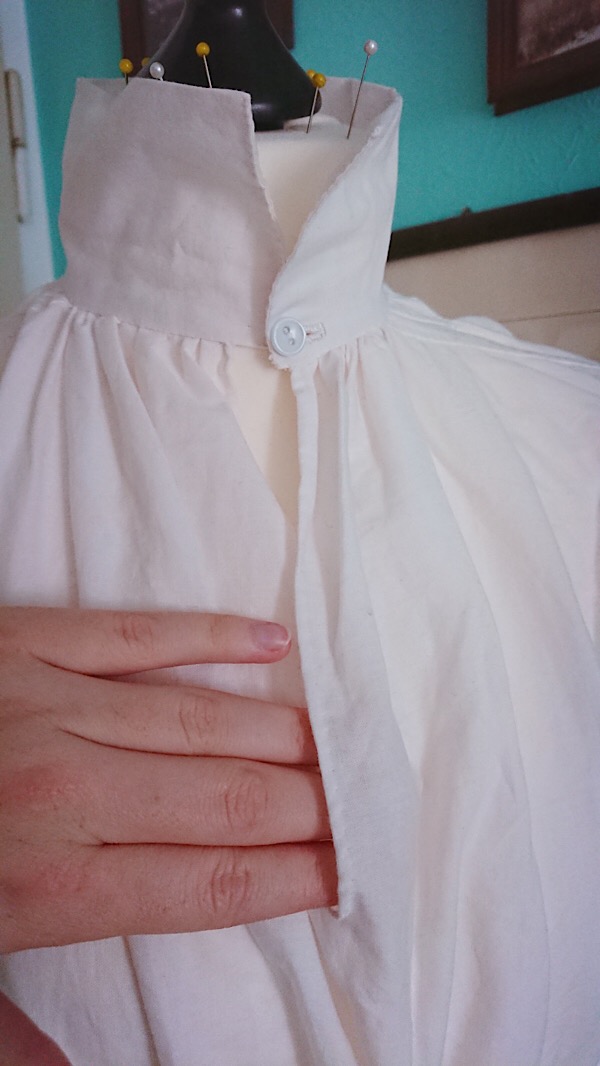
Hier sieht man den seitlichen Schlitz und das Tunnelband. / The side view of the shirt. It shows the tunnel for the ribbon and the open space between front and back.
#06 Nun fehlen nur noch die Knopflöcher und Knöpfe. Am Armband können 1 oder 2 angebracht werden (je nachdem wie breit das Armband ist). Am Kragen oben genügt ein Knopf.
Optional können auch die Rüschen am Auschnitt weggelassen werden.
#06 Now sew the buttonholes. For the armband sew one or two holes, for the collar you just need one. The collar ruffles can be missed out if you don‘t want them.
Mein Ausschnitt hat keine Rüschen, dafür einen sehr hohen Kragen. / My collar without any ruffles.
Die Vorderansicht des fertigen Shirts. / The front of the finished habit shirt

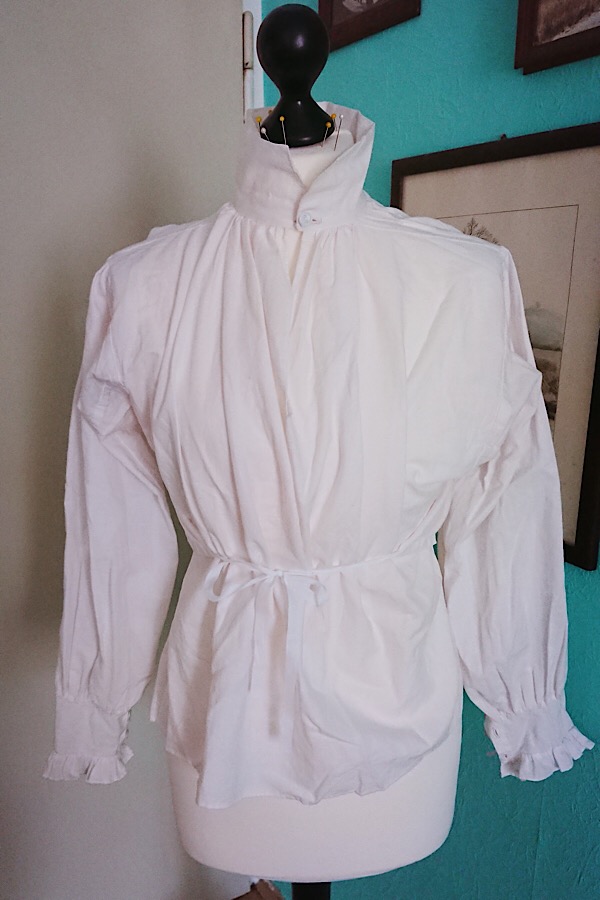
Das fertige Shirt von hinten. / The back of the finished shirt.